Harness Integration

Harness is a CI/CD service platform that provides a simple and secure way for engineering and DevOps teams to release applications faster, safer, and more secure. Harness automates the entire CI/CD process, which helps build, test, and deploy improved features more quickly. To learn more about key concepts of Harness, you can refer to this Harness document: Harness Key Concepts.

If you are an automation tester and using Harness CI, you might want to integrate Katalon Runtime Engine (KRE) and create a CI/CI pipeline to execute your tests.

This tutorial shows you how to set up a Workflow with Harness to build your Katalon tests with the Katalon Docker image, which contains KRE, and execute the tests in a Kubernetes cluster farm.

The integration in this tutorial is performed on Harness FirstGen.

Requirements

With the proposed scenario, you need to first configure the following components to work with Harness:

  • An active Katalon Runtime Engine license.

  • A Harness account.

  • Docker is installed and running.

  • Kubernetes is installed and running.

  • Kubernetes manifest files to configure the build for your Katalon Docker image. You can refer to the sample manifest files in our GitHub repository: Sample manifests.

Set up your Harness Account

Before creating a Workflow in Harness, you need to set up your Account.

Follow these steps:

  1. Set up a Harness Delegate.
    For detailed instructions, see Harness document: Harness Delegate Installation.
  2. Set up a Cloud Provider.
    For detailed instructions on adding a Kubernetes Cloud Provider, see Harness document: Add Kubernetes Cluster Cloud Provider.
    Harness Kubernetes Cloud Provider
  3. Add an Artifact Server.
    To add a Docker Registry Artifact Server for the Katalon Docker image, see Harness document: Add Docker Registry Artifact Server.
    Harness Docker Registry Artifact Server
  4. Add a Source Repo Provider.
    To add a GitHub Source Repo Provider, see Harness document: Add a GitHub Repo.

    Here we add a GitHub Source Repo Provider with the GitHub repository URL: https://github.com/katalon-studio-samples/ci-samples. You can fork this repository and provide your own GitHub Personal Access Token when you configure the Source Repo Provider.

    Harness GitHub Source Repo Provider

Set up a Harness Application

A Harness Application represents a group of microservices, their deployment pipelines, and all the building blocks for those pipelines. Harness represents your microservice using a logical group of one or more entities: Services, Environments, Workflows, Pipelines, Triggers, and Infrastructure Provisioners.

Here we set up an Application with the necessary configurations to create Workflow for our pipeline.

Add a Harness Application

To add a Harness Application, you can refer to this Harness document: Set up Harness Application.

Add a Service to the Application

Services represent your microservices/apps. You define where the artifacts for those microservices come from, and the container specs, configuration variables, and files for those microservices.

Here we add a Service and configure it with the defined Artifact Server and manifest files.

Follow these steps:

  1. In your Application, click Service > Add Service.
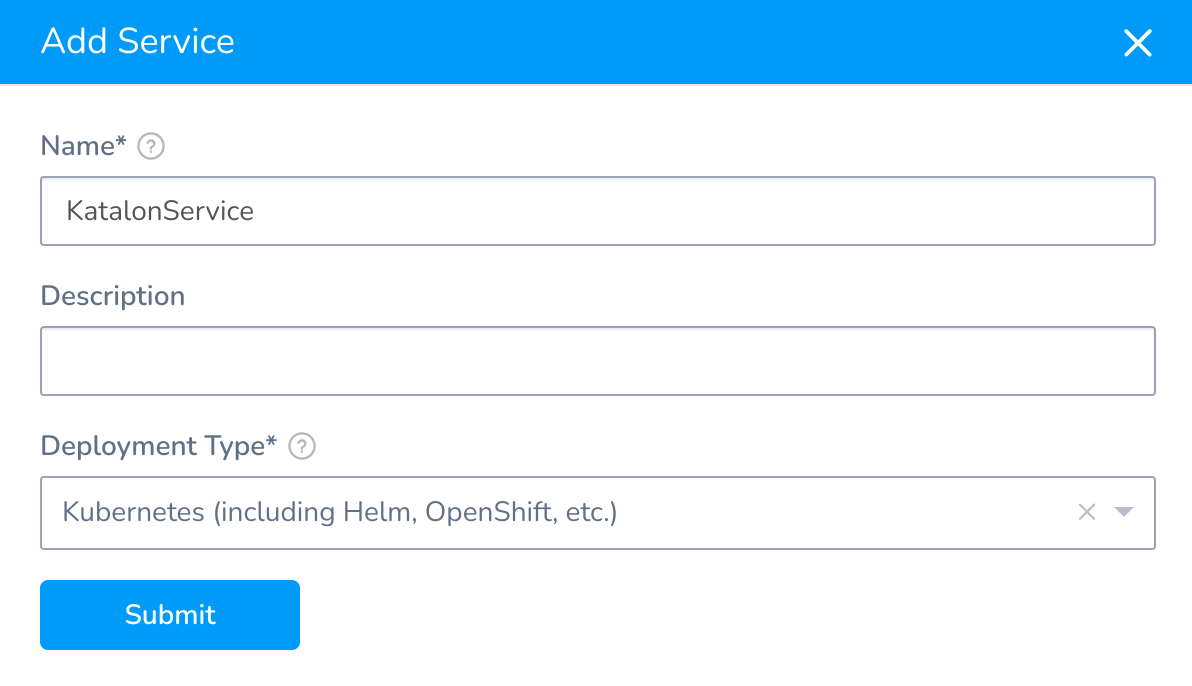
  2. In the opened Add Service dialog, specify the name and deployment type.
    As we use a Kubernetes Cloud Provider, we specify the Kubernetes Deployment Type. Add Service dialog
  3. Click Submit.
  4. Add an Artifact Source. In the Service Overview section of the new Service, click Add Artifact Source > Docker Registry.

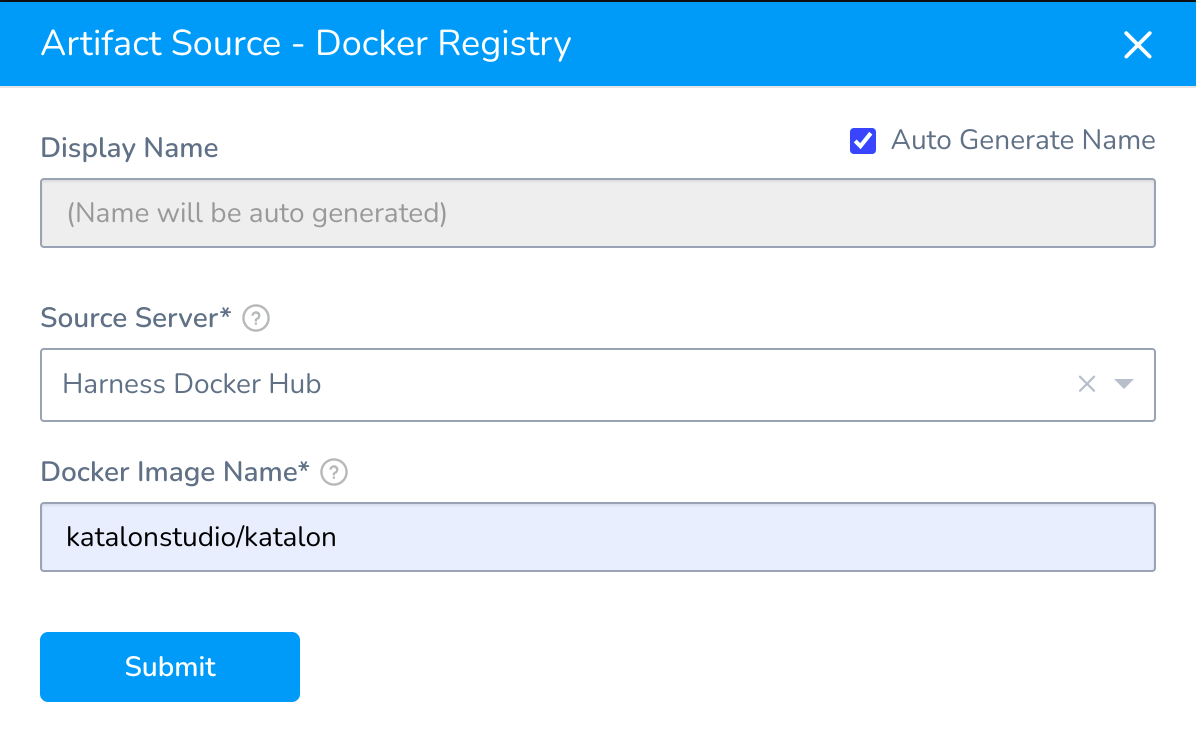
    Here we specify the Artifact Source with our Docker Registry Artifact Server and the name of the Katalon Docker image (katalonstudio/katalon).

    Artifact Source - Docker Registry dialog

  5. Link manifest files to the Service. In the Manifests section of the Service, click on the option icon (top-right corner) and select Link Remote Manifests.

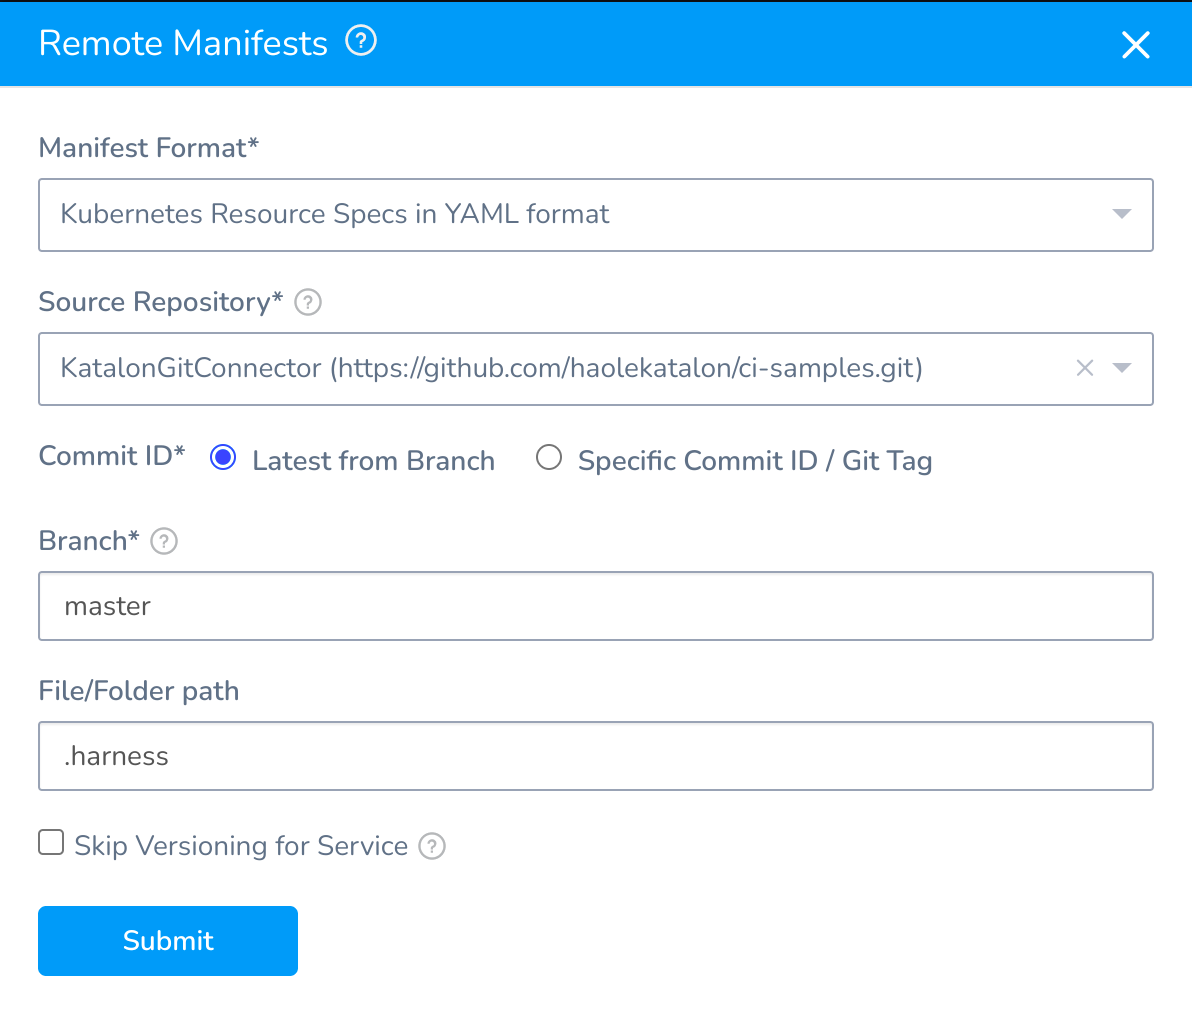
    Here we specify the Source Repository with our GitHub Source Repo Provider and the branch, folder path that contains the manifest files (.harness).

    Remote Manifests dialog
  6. Defined a variable for Katalon API Key. In the Configuration / Config Variables, click Add Variable and define a variable representing the Katalon API Key.

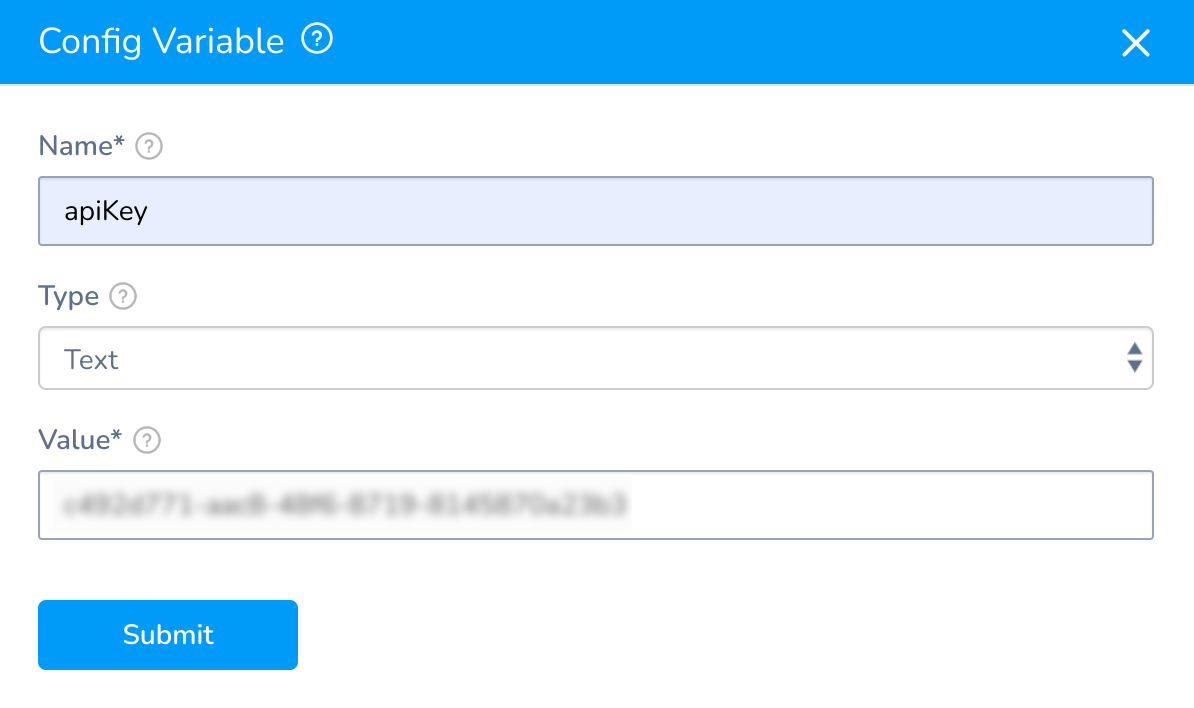
    In the sample manifest files, we create a variable named apiKey to represent the Katalon API Key. Therefore, in the Service we need to define the variable and provide the value (our Katalon API Key).Sample manifest files with apiKey variable

    Config Variable dialog

    To get your Katalon API Key, see: Generate a Katalon API Key

The Service is then configured with an Artifact Source, Kubernetes manifests stored in our GitHub repository, and a variable representing the Katalon API Key.
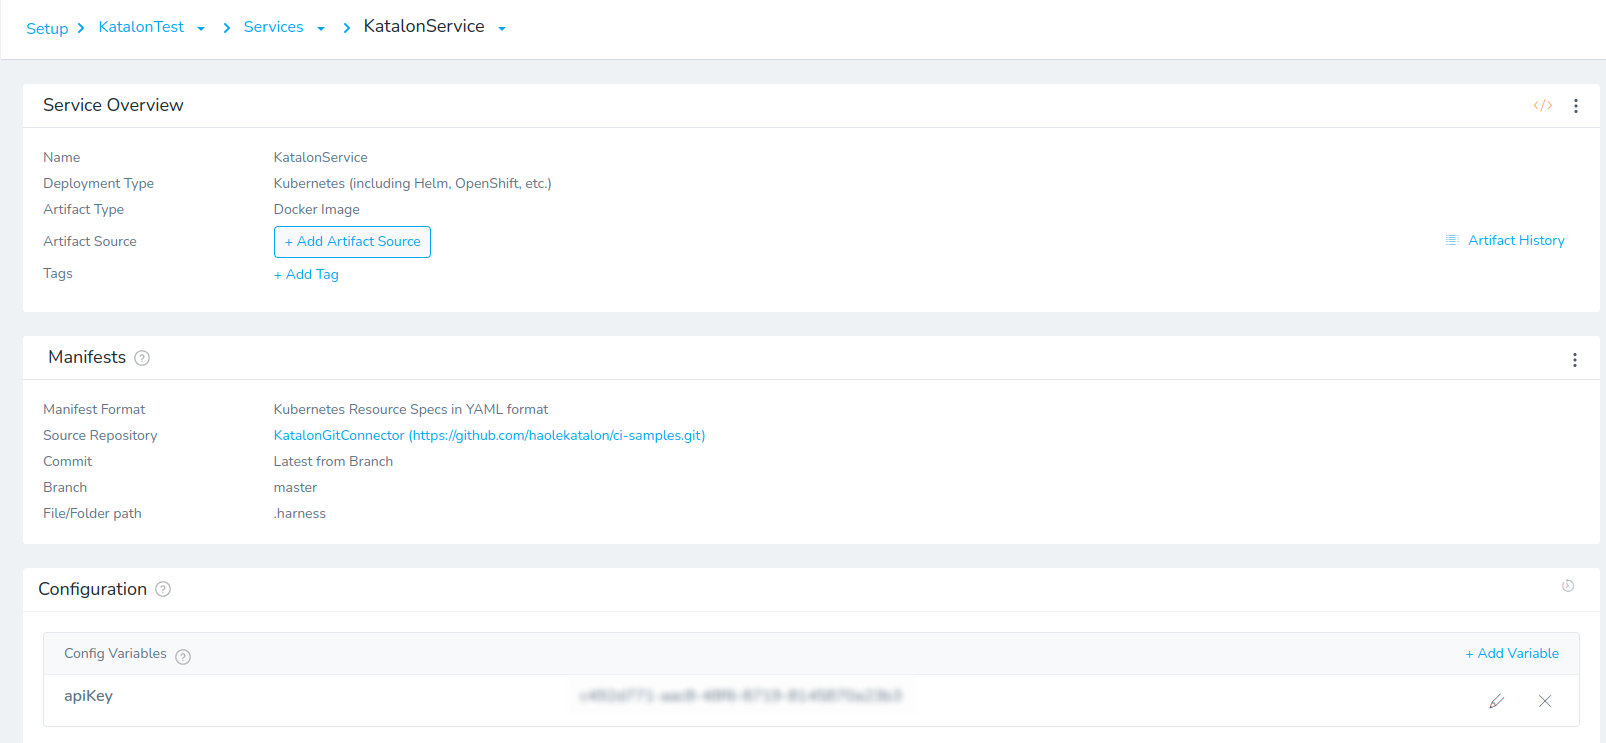
Harness Service configured

Add an Environment to the Application

You define your target deployment infrastructure using a Harness Environment. Environments represent your deployment infrastructures, such as Dev, QA, Stage, Production, etc.

In our case, we add an Environment that uses the Kubernetes Cloud Provider.

Follow these steps:

  1. In your Application, click Environments > Add Environment and create a new Environment.
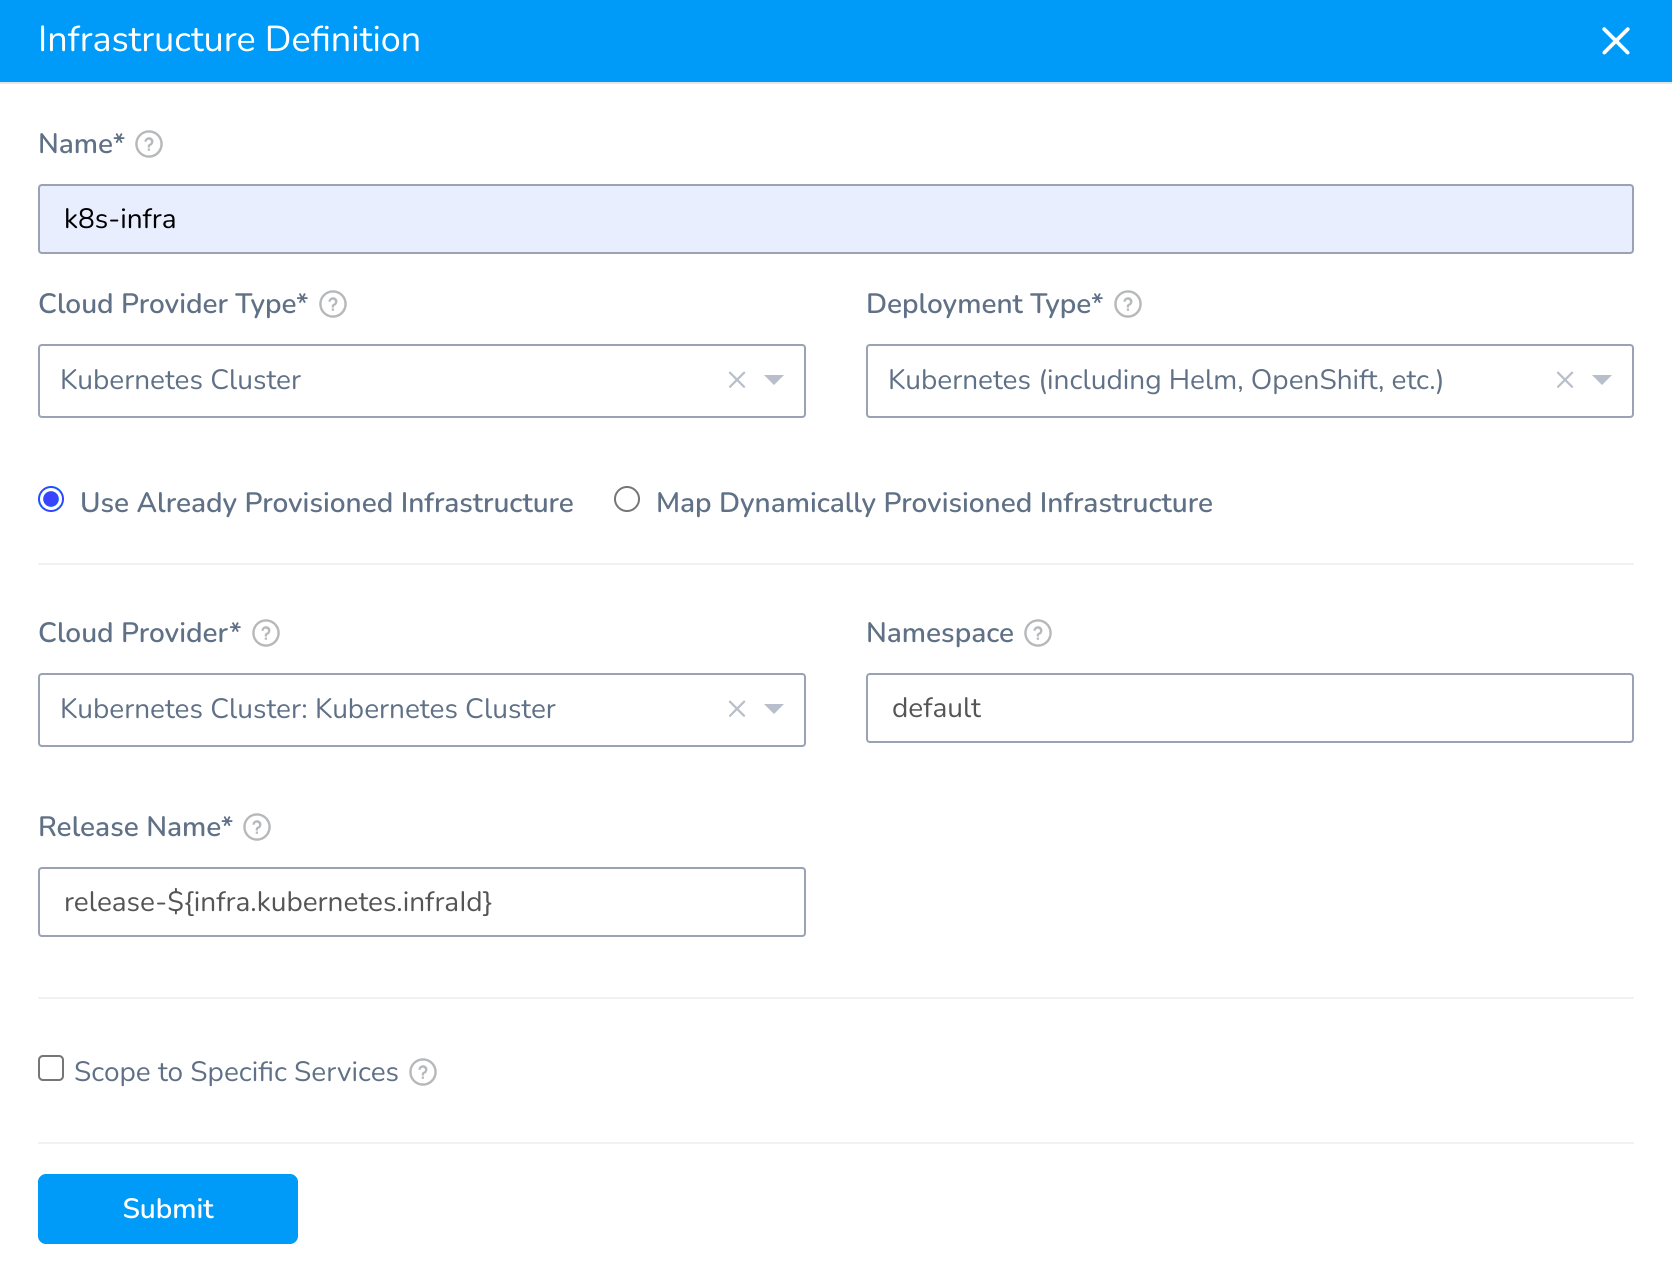
  2. In the created Environment, click Add Infrastructure Definition and specify the properties for your infrastructure.

    As we want to execute our tests in a Kubernetes cluster, which is defined in the Kubernetes Cloud Provider, we specify the Infrastructure as follows.

    Harness Infrastructure Definition

  3. Click Submit.

Create a Harness Workflow

Workflows define the deployment orchestration steps, including how a Service is deployed, verified, rolled back, and more.

Here we create a Workflow that includes steps to build, execute our tests, and finally clean up the deployed workload.

Add a Workflow

To add a Workflow, follow these steps:
  1. In your Application, click Workflows > Add Workflow.
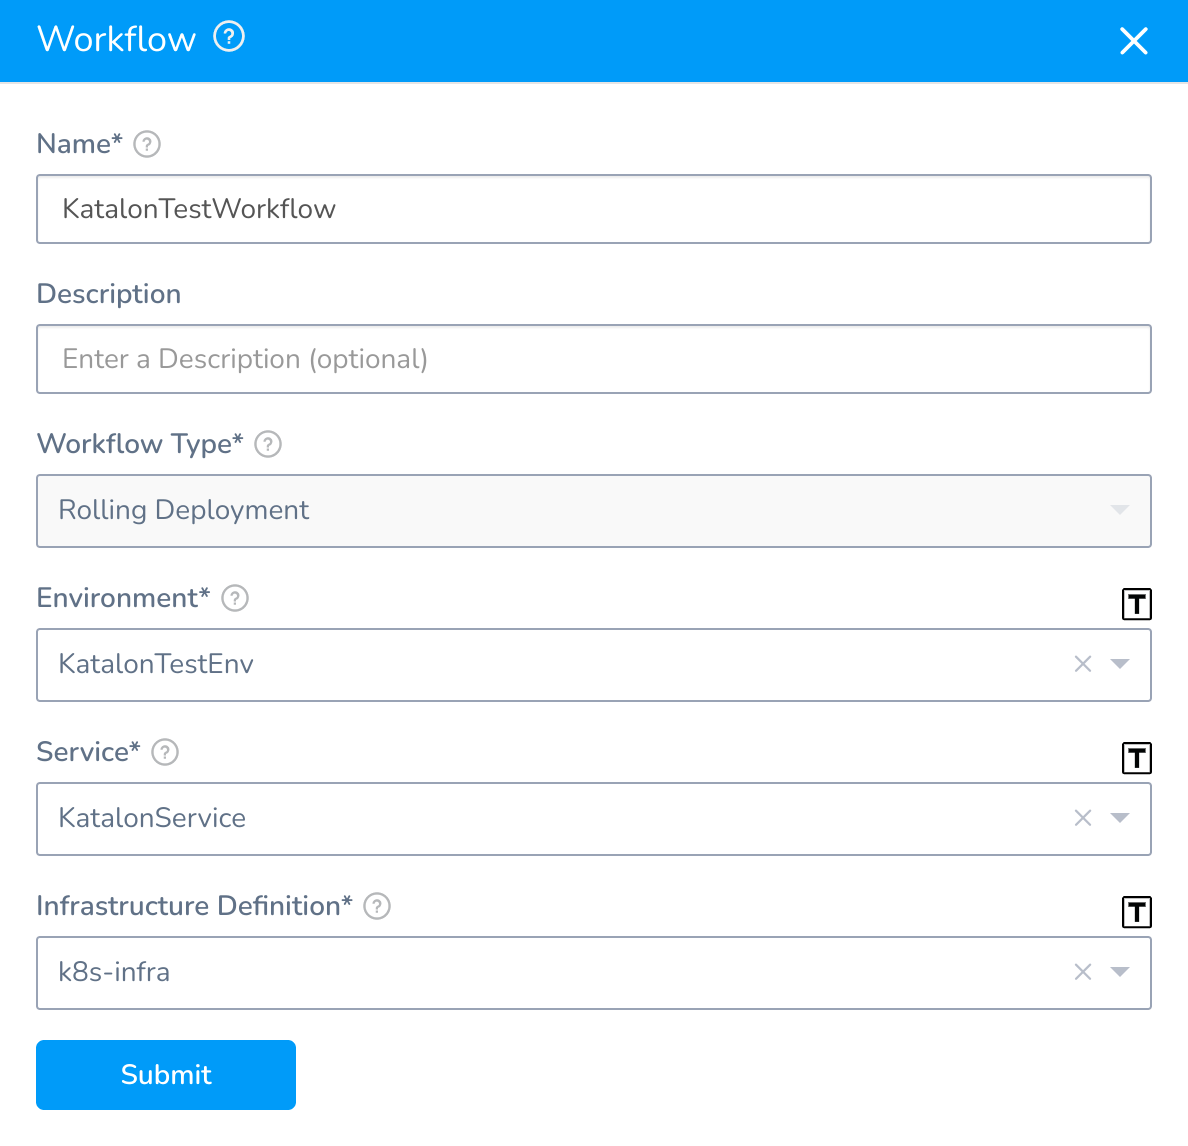
  2. In the opened dialog, specify the properties for your Workflow.

    Here we create a Rolling Deployment with our defined Environment, Service, and Infrastructure.

    Harness Workflow dialog

  3. Click Submit.

Add a Workflow Variable

In the sample manifest files, we create a Job named test, so we need to add a Workflow Variable to help Harness Workflow identify the Job that needs executing.

Harness manifest file

To add a Workflow Variable, follow these steps:

  1. Open the created Workflow and select Workflow Variables.
  2. In the opened dialog, define a variable with type text and provide the default value (the Job name).
    In our case, the value is test.
    Harness Workflow Variables dialog

Configure the Workflow

After setting up the Workflow Variable, we configure the Workflow to deploy the test build with the included Kubernetes manifests.

Follow these steps:

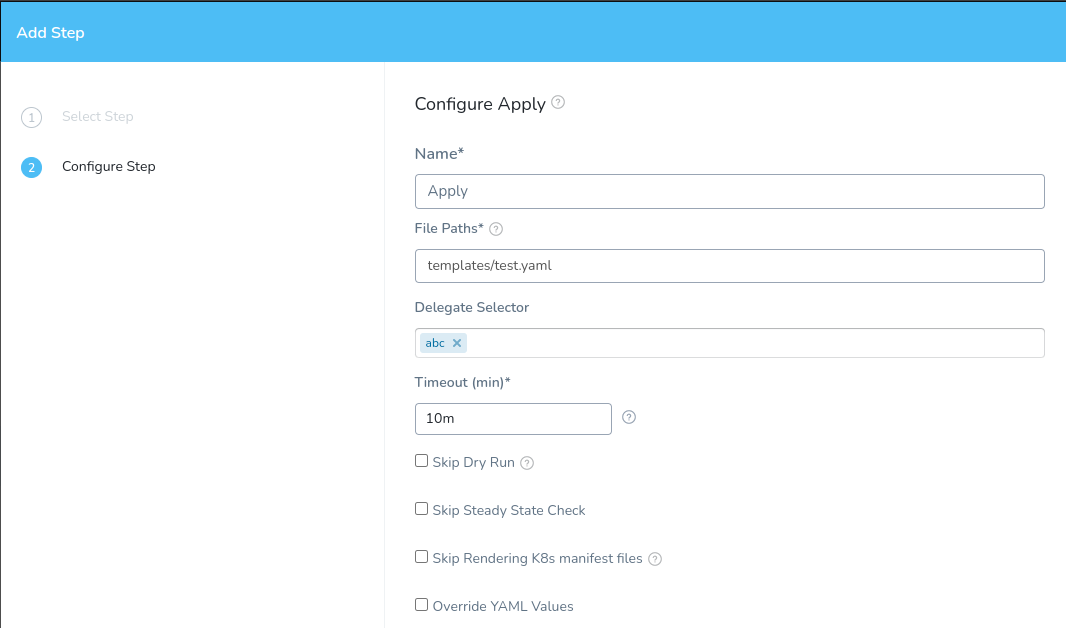
  1. In the Deploy stage of the Workflow, add an Apply step.
    This step applies our Kubernetes manifest file (test.yaml) to build and execute our tests.
    Harness Apply step
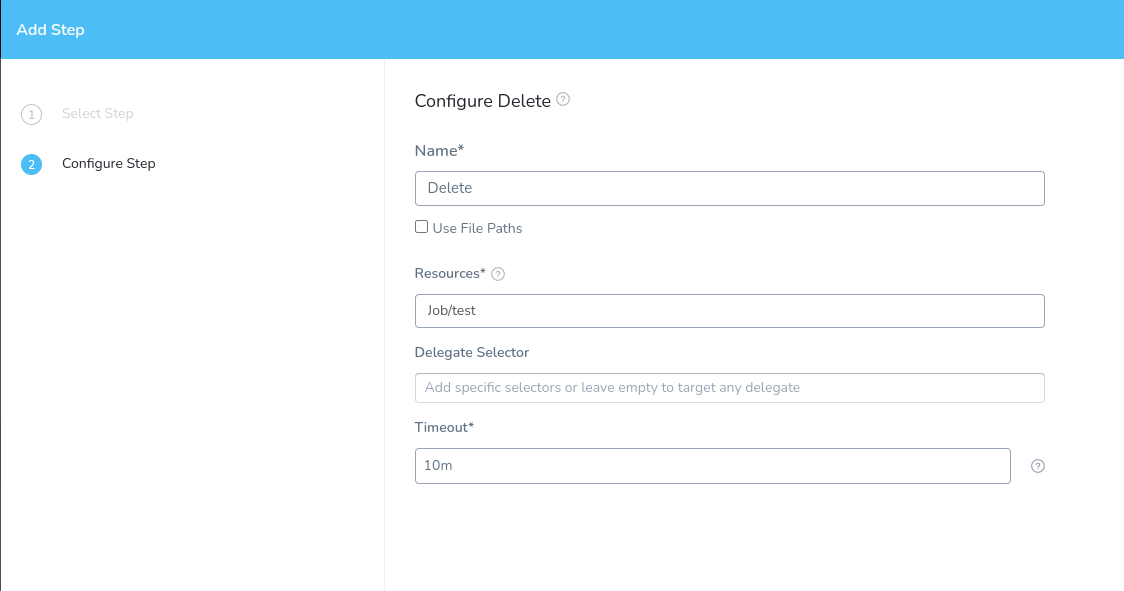
  2. In the Wrap Up stage of the Workflow, add a Delete step.
    The Delete step helps clean up the workload deployed by the Deploy stage.
    Harness Delete step
  3. Add a Rollback step. In the Rollback Steps / Deploy stage, add a Delete step as in Wrap Up stage.
    The Rollback steps initiate a rollback of your most-recent successful deployment.

Your Workflow is now configured with an Apply step, a Delete step, and Rollback steps.
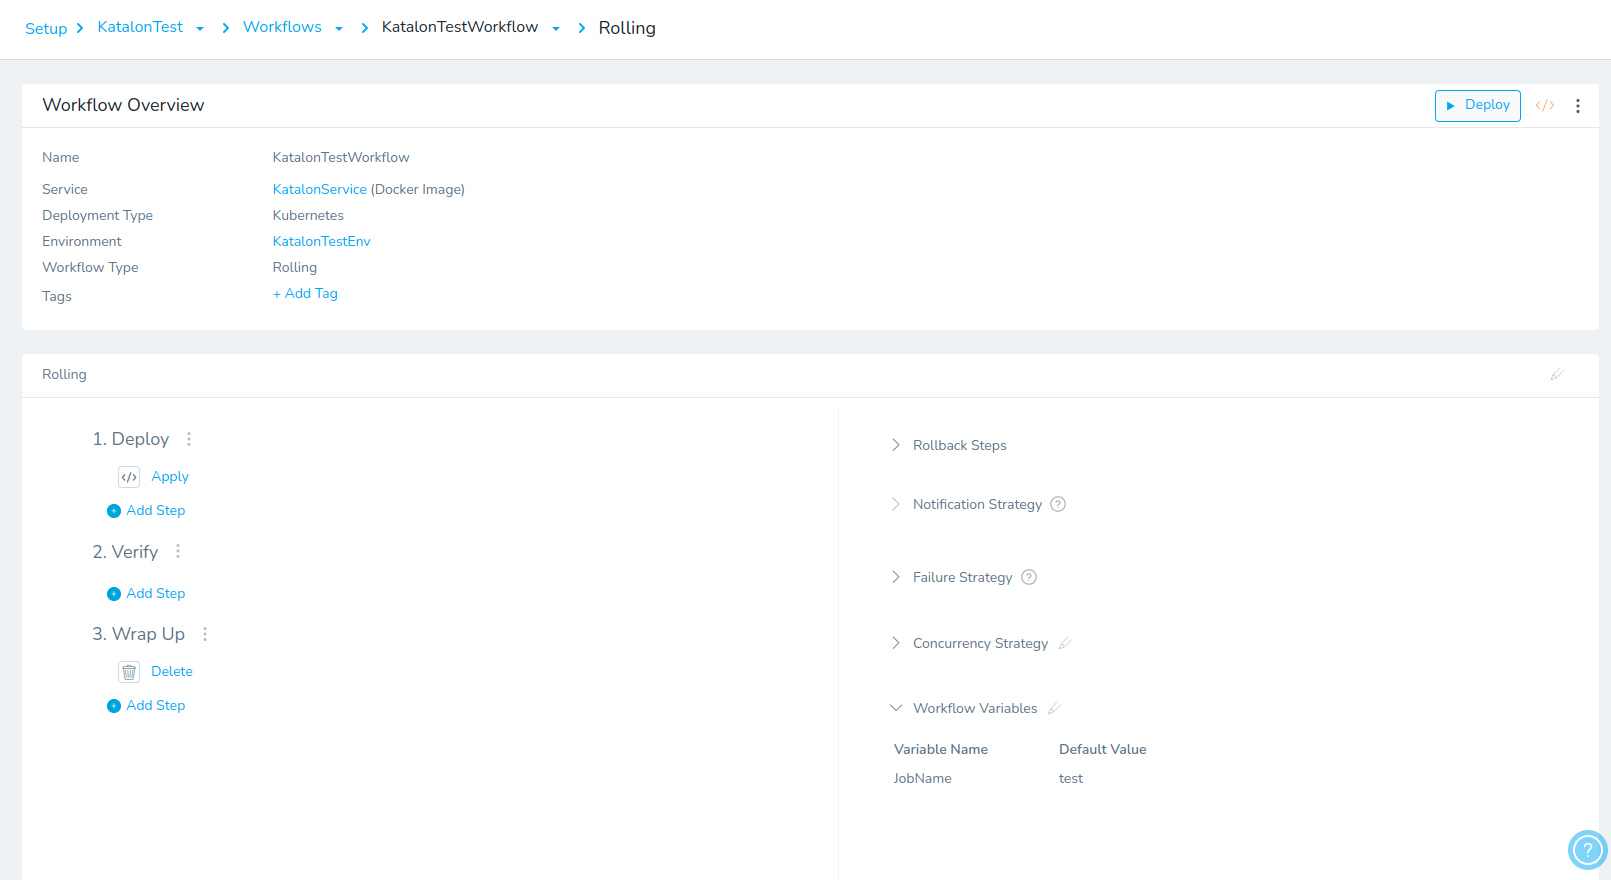
Harness Workflow configured

Deploy the Workflow